Android Audio Tutorial [Part Five] :AudioMixer
Audio mixing is the process by which multiple sounds
are combined into one or more channels. In the process, a source's volume
level, frequency content, dynamics, and panoramic position are manipulated and
or enhanced. Also, effects such as reverberation and echo may be added. This
practical, aesthetic, or otherwise creative treatment is done in order to
produce a finished version that is appealing to listeners.
Audio mixing is practiced for music, film, television
and live sound. The process is generally carried out by a mixing engineer
operating a mixing console or digital audio workstation.
In Android, AudioMixer does the mixing operation. Let
us see that in a slightly detailed manner.

The
figure above represents the basic working of AudioMixer for an interface.
We
can see that the operations are mainly governed by the following parameters [Variables
or Functions].
a) Parameter: set using
setParameter()
b) Resampler: set using setResampler()
c) Volume: function calls
like adjustVolumeRamp()
d) Buffer: using setBufferProvider()
e) Track: functions like getTrackName().
Well,
There are many others we will slowly explore them.
The
core of MixerThread() is an mState variable (state_t). All the mixing work will
be reflected in this variable - in particular, the tracks array.

Note,
MAX_NUM_TRACKS=32, which means that up to 32 simultaneous mixes are supported.


The
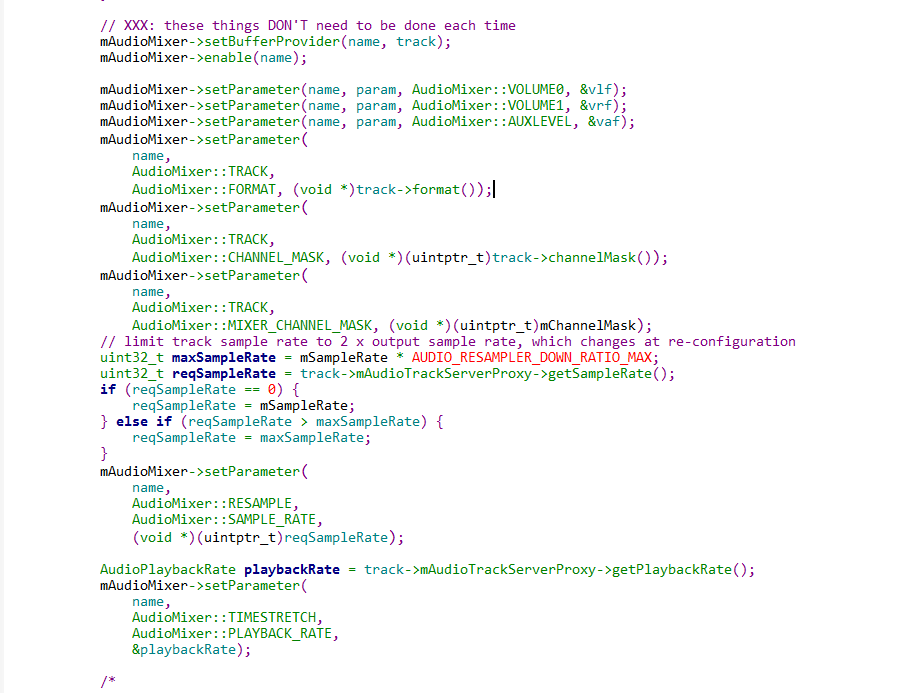
data type track_t is a description of each track. Setting the different values in track_t is as good as calling setParameter().
If
the property changes, AudioMixer will be notified via setParamter() as shown below.
We
saw in the previous tutorial that threadLoop_mix() calls the mAudioMixer->process(pts)
to mix the buffers.

Let
us look at AudioMixer::process() function.

We
see that the process function just calls mState->hook() function.
"hook"
is the function pointer to the next operation in mixing process. It can be flexibly
attached to various functions depending on what needs to be done next.
If
we see the AudioMixer.cpp
we will See there are a lot of hook functions defined.

Let
us see how it is used, In the constructor of the AudioMixer hook is initialized
to process__nop which is the initialization function.

In
the subsequent calls during process__validate( ) we can see that the hook
function is re-assigned to various processing functions under different
situations as shown below.

mState->hook
will be re-assigned in the following situations.
a) When AudioMixer is
initialized, the hook points to process_nop.
b) When the state changes
or parameters change (such as setParameter), call invalidateState. At this
point the hook points to process__validate.
c) AudioMixer::process is
the entrance to the external call hook.

In
the above figure, process__validate() code re-assigns hook to different functionality.
process__validate( ) analyzes the track in the enabled state one by one through the while
loop, counts its internal status bits (such as NEEDS_AUX__MASK,
NEEDS_RESAMPLE__MASK, and so on), and derives the reasonable values of
countActiveTracks, resampling, volumeRamp, and all16BitsStereoNoResample.
Select
the correct hook implementation and call this hook function to perform the
specific task as shown below.

We
now have seen a basic AudioMixer implementation in Android, We will get into
more details as we cover various other components.
Great tips, many thanks for sharing. I have printed and will stick on the wall! I like this blog. Audio Mixing
ReplyDeleteThanks for sharing about audio mixer have a look at
ReplyDeleteSound Engineering in Chennai
Sound Engineering Colleges in Chennai
School Of Audio Engineering Chennai
Audio Engineering In Chennai
Best Sound Engineering Colleges in Chennai
Hey nice blog,Thanks for this helpful information come back again for more interesting information. Keep it up! Sound Mixing Studio
ReplyDeleteInteresting Article. Hoping that you will continue posting an article having a useful information. Yinka Alege
ReplyDelete